Tuesday 4 January 2022

Testing new posts - especially whether an email notifying new content on blog is sent to subscribers

Well the last post on here was to do with the International Print Exhibition in Wrexham and how I would love to have been there for the opening and particularly to see all of the other  artwork.  If this works I will do some 'catch up' on here.

NOTE for those who are unaware Blogger/Google notified us 'bloggers' that the "Sign up by Email" function was to be 'scrapped' after June 2020 or possibly 2021?  There was to be no replacement!


Re losing Feed burner  Follow by Email”....


The impression I get is that followers who are already on my 'RSS email Feed' list - continue to receive email notifications whenever I create new posts on my blog.

HOWEVER the gadget for "Follow by Email" is no longer visible in the column to the side of my blog.  I double checked by going to my dashboard and then 'Page Layout' and clicked on 'Add a Gadget' ------Alas-------"Follow by Email" is no longer on the list of gadgets.  


Anyway lets see...........

I am pleased to report that through the excellent research and advice offered through https://sofanmax.blogspot.com/2021/10/followit-to-replace-feedburner-follow-by-email-widget-in-blogger-for-free.html.   I was able to register with Follow.it. and thereby enable those people who wished to subscribe, to do so.  This was/is at no cost........ 


Just doing a further test so will resume posting on here soon. 

Wednesday 1 May 2019

Z is for Zea Mays

I have known about ZeaMays for a good few years now.. I can't remember what it was that first brought me onto their website.  Established by Liz Chalfin, in 2000, Zea Mays Printmaking, is a print studio in Florence, Massachusetts, USA.   

So it's a place where you can go to do some printmaking or go see an exhibition.  You might also go there to learn specifically about non toxic printmaking OR to do one of the excellent printmaking courses they run there with some really good artists.  Another thing they have established is an 'artists residencies' programme.  It's a pretty large detached building with four floors and a basement.  To me it looks like it might previously have been an old mill or a factory or maybe a storehouse.

One of the things I particularly like about Zea Mays is the research they undertake and publish on their website.     More on that later.  They have a members gallery on their website too,  as all good print workshops should do, in my opinion.  Here are a few pieces I have selected from there:


"The Things Between us"   photo-intaglio and watercolour 22" x 30"
Liz Chalfin - her website


"Nearly No. 1" monotype 7 x 5.5 inches
Monotype by Tekla McInerney so subtle......


"Rudimentary Water #3" which is a woodcut monoprint from her Rudimentary Water series


Love how she is using the woodcut block in her mono prints - when I originally saw these, I thought they were watercolor monotype or just very transparent monotypes

8 x 8 inches.   artist. Joan Dix Blair of ZMP

Getting back to the research that goes on at Zea Mays.  It's so hard to select from the list of things that they have done...BUT... I have gone for the 'quest' to find 'solvents' to use with Akua Intaglio inks, in monotypes.  As I have made the 'changeover' to using these inks, of course this little research project, would invariably interest me.  
It disappoints me, you know, the amount of people who are so against even trying these inks, as they are an absolute 'gift'. 


1. test proof, using diluted washing soda crystals

They think that they wont be 'as good' as the traditionally used oil-based etching inks. But these inks are just as good, it's just a question of becoming accustomed to using them.


I have to admit here, that I purchased the 'Akua Kolor' inks in the first instance and I did find them difficult to use.  They are a lot more fluid than the Akua Intaglio inks.....I think maybe one needs a bit more patience and persistence with them. By the way they are also referred to, as Akua Liquid Pigment.  They are mainly 'designed for use in monotype printmaking.  Speedball(USA) own the brand nowadays.

Here is a delightful monotype by Nancy Doniger a ZMP member. check out her website

Working with Akua enables the artist to have a lot more time to work 'creatively'.  I can illustrate this by giving an example.  Let's say I am inking a plate that is say 50 x 70 cm, whereas using oil based inks would have taken about one and a half, to two hours - using Akua intaglio inks only takes me about half an hour. Clean up is water based and so so easy.  I can't wait to try this out myself.


3. test proof, using diluted washing soda crystals


I have long admired the print works of Joyce Silverstone.  In some pieces she achieves this  dynamic sense of space, in others such as this one, there's just something, that very much appeals to me.  Among other techniques Joyce sometimes combines lithograph, relief print with monotype and some 'trace monotype'.  I get the sense that she is a really good teacher from the course descriptions - Here's her website

 This piece is by Anita Hunt who is a formidable etcher and a 'whizz', with the 'spit bite'.  I first came across her work on the previously mentioned "Interaction" networking platform(now defunct).  In fact my friend Tatiana and I, participated in a collaboration for a print installation called Rabbit Saves the World"which was held at  the Impact6 Printmaking Conference held in Bristol U.W.E., in 2009


"Dissolution I" drypoint and spit bite aquatint 9 x 9 inches
Check out Anita's website

This piece looks like it might have been created using watercolour monotype, although maybe not?......It's by ZMP member Anne Burton
She does not seem to have a website currently so check out her work and many others on the Zea Mays members galleries website


Oh and before I forget, apparently one should not combine washing-soda-crystals with aluminium. So bear that in mind if you try this.  I'll use a polypropylene plate possibly a textured one - I like how it's grain-like-texture 'holds' the ink.


This is the final image within the pages about Solvents for Akua Intaglio Inks, within the RESEARCH section of ZeaMays website

https://www.zeamaysprintmaking.com

Sunday 28 April 2019

X is for Xing, Xu, Xiuhua, Xing, Xiao, Xinping, Xianqiao, Xin Lu and Xuewu

Wow that's a mouthful of printmakers names from China.  I have long admired printmakers from China.  Quite often the works will be done on a large scale using relief printmaking and the majority of that will be woodcut.  Having looked at these works in printmaking catalogue books it will be obvious that these have been painstakingly undertaken over several weeks to months, they are really impressive.


“Illusion Dream” woodcut by Zhang XiaoChun 100cm x 70cm
Link to information on him further down


“June in Southern China”  by  Zhou Xing  47 x 50 cm
Link to information on him further down
There are some Chinese printmakers that I have come across - which I wouldn't have known about, had I not participated (following submission and selection) in, International   Printmaking Biennials such as Yunnan and Guanlan, in China.


reduction woodcut by Zhang-Xiaochun
While perusing through some of my printmaking catalogue books I've encountered some very impressive pieces.   However the 'specifications; of the pieces I have particularly liked,  have only had the name of the artist given in Chinese characters so of course, as I don't speak or read the Chinese language its impossible for me to try to find further information about them on the Internet....which is so disappointing and I think that's such a shame.  

"Girls Covering Theirs Faces". lithograph  58 x 48cm  by Su Xinping (link further down)


It would have been quite nice had I been able to get in touch with them through their website.  

Come to think of it that would be useful for them as well as then other people from the art/printmaking world could contact them about featuring them in exhibitions books research and so on.


Silkscreen By XuYi Jian Mei  (no size given)


The other thing which I must apologise for is that with some of the artworks there was no title or no technique given or no indication of size.

I would imagine where the size is not indicated that the prints will generally be approximately be about 50 x 70 cm or larger.

woodcut by Xu Chengchun (no size given)


I really liked this as it seemed somewhat progressive beyond the landscape portrait - although the 4th and 5th do seem to fit this category also .  Its my favourite so far but its a shame that it has hardly any details AND that the image you see here is as large as it gets.

Couldn't find a website either.


"New Moon Spring". by Xin Lu 
that name doesn't seem substantial  enough either.


Another print by the artist who made the first print shown at the top of this post namely;  Zhou Xing. No technical details available.


“Clear Mountain Stream” by  Zhou Xing  47 x 50 cm
Link to more on  Zhou Xing
The same goes for this piece by Zhang XiaoChun - his is the second print down from the top of this post.
Here is a link to some more info on him on this website. 


reduction woodcut. by Zhang XiaoChun


Woodcut by Su Xin Ping- I like how 'disconcerted' this image makes you feel.
As a visual artist Su Xinping works with oil painting, lithography, etchings and woodcuts.
Over the past couple of decades he has also established an international profile.  I like his surreal take on things and commentary from the old China to the new China.

Here is link to more about him /his work


"Classical No.2" silkscreen by Zheng Xuewuale

I hereby include this print in a gesture of  protest....


It's very disappointing to say that I could not find one single female printmaker from China....


this is by a non "X" artist
Li Hongren lithograph and embossing.

+++++++++++++++++++++++++++++++++++++++++++++++++++++++++++++

W is for woodcut printmaking - Karen Kunc - the smart Way

I have blogged on here in the past about an artist called Karen Kunc.  Her relief wood cut prints are mind bogglingly sophisticated.  I found it quite difficult to select which ones to include with this post because they look so complicated.
She has a lot of success commercially but for doing her own thing in her printmaking as opposed to making prints of animals and landscapes or seascapes, which sadly is what a lot of printmakers seem to do .   Having said that I do of course appreciate why they are inclined to make what sells..

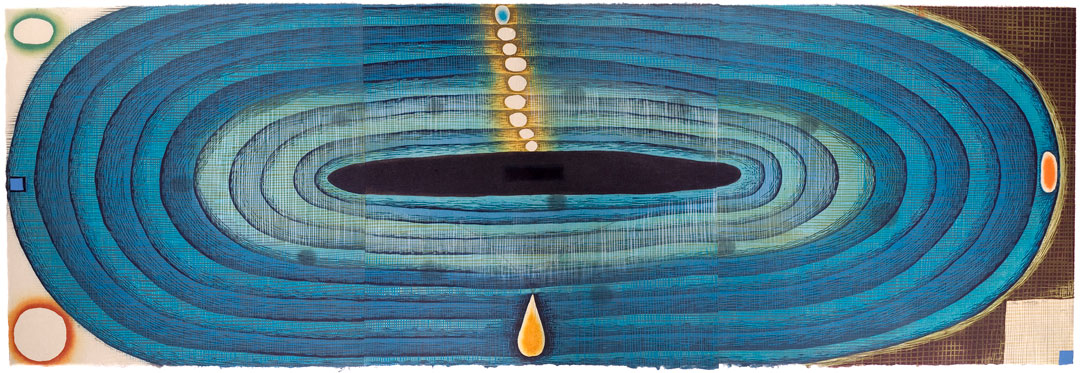
Above:  "Bell Acqua". Woodcut       Karen Kunc

I wish it was possible to download ones most favourite videos from You Tube,  as it is horrible when you go on there to look at something 'special' like for example videos covering a printmaking workshop where Karen was tutoring people on her approach to using woodcut, only to find that it has disappeared.
Fortunately the videos I wanted to look at are still on there.
I have viewed  them previously - I even made notes when I previously looked at them but that was ages ago and I am on a new computer by now and despite what they say about it being the case that you can transfer all of your data over to a new Operating System  - well that has not been my experience.  There are lots of bits and pieces that I can't seem to locate.......fortunately I haven't come up against anything critical and irreplaceable as of yet.
Let's just hope that, this remains to be the case.


Above: "The Wanting Pool" (detail) Karen Kunc


The Wood Block:

Birch Plywood seems to work well for this process.   It will of course need sanding too. Image can then be transferred to the wood block.  Use feint pencil for this. Karen mentions that she then uses a layer of shellac onto her woodblock.  This she applies by buffing it on, with a cloth.

I will use Lascaux acrylic hard ground as it will be easier and I know that it will protect the wood from being penetrated by the rolled on ink.  Additionally I don't want to go out and buy yet another product, such as Shellac, when I have already got something that will work just as well.


THE VIDEOS 
The videos were kindly uploaded by Mirka Hokkanen  She is an artist, originally from Finland, who has been living in the USA for quite sometime currently residing in Honolulu Hawaii.  I just love her "Bather" reduction relief print on the left - my cat used to groom himself similarly but these days I have to do all of his grooming for him and of course he doesn't approve of me trying to comb out his horribly dense tangles.

AS I mentioned I posted previously on my blog about these excellent videos, in which I just uploaded a photo of one of Karens woodcut prints and a link to the videos (which is now defunct).

Not to worry the link must have been on someones website which has now closed down.  The links I provide here, takes you straight to You Tube.

This time however - I have taken a different approach as I really want printmakers to share in the wealth of Karen's experience and my enthusiasm. So I have carefully watched through, the videos of this workshop which comprise of six videos of approximately 12 minutes each,  I did a lot of stopping and starting (which is an advantage if you are only able to watch the video recording as opposed to being present at the workshop, which took place at a place called Sev Shoon Arts Centre in Seattle, Washington State, USA.
I have included their website address but It was 'forbidden" when I tried visiting it a while ago, on both my web browsers i.e., Safari and Google Chrome.  For the sake of Seattle based printmakers I sure hope it hasn't closed down!?

There are some other videos on You Tube of Karen doing the actual cutting into the wood block with the Japanese style tools.  These look like the quite expensive ones that cost about £30 each but I suppose if one really wanted to use these then it would be a case of gradually buying the essential cutting tools and then looking after them and over time increasing the tools and materials. 

My focus herein, is on the inking methods and strategies.

Above: 1
Here we see Karen rolling ink in graduated colour ‘bands’ over the MASK(stencil) openings or ‘apertures’.  Remember these could be cut or even torn away shapes.


It seems that using ordinary craft brown paper works well for creating stencils and masks to use for inking the block.  It can be used as a way of keeping other areas clean of course and we have all probably used a mask in this way at least once in the course of our printmaking. 


Above: 2
Karen blending the edge of the ‘rolled on edge’ of the ‘inked areas’ with her finger tips, heal of the palm and the side of her hands - this will soften the edges of the inked areas where this effect is desired.  Seeing an artist working in this way makes me a lot more interested in working with woodcut I must say.  Those of you who are familiar with my work will know that I am "intaglio" orientated, in the main.


Of course the stencil sheet will need to be kept in place by using low tack adhesive.  Additionally one will devise registration marks for the printmaking paper which in this case is a Washi paper. Having the paper sheet smaller than the woodblock, make registration easier. Inks are Lithographic, being used for their higher pigment concentration and lack of dryer additives.


Above: 3
Here we see the effect of applying a ‘graduated roll’  to specific areas through the paper mask. ,  The dusky pink colour gives way through  to transparent and visually disappears to nothing - which I just love.  It's important to bear in mind that the ink being applied to these areas is with small brayers and that it has transparent extender mixed in with it.


Left:
Title: Land Escape"
artists book
Karen Kunc

Love the colours on this piece the shapes especially like how that upward curved edge to the paper totally 'adds' to the overall affect.

Left: 4
Here we can see the effect on the woodcut block - where Karen has inked the edges of a red 'triangular' shape.   This was achieved  inking around the edges of a cut-away triangle.  It shows how she inks around the inner edge of triangular cut away shape on the brown paper mask.  She also ‘softened’ it with her fingertips.
Left: 5

As the first proof seemed a bit too faint,   with this proof, you can see that Karen has added less transparent base, to her ink mix,  so that, in effect, as we can see, in this second  proof the blue appears darker to the eye.

Left: 6
Here you notice that each of the little circles have been rolled with different colours.  In some cases the stencil was cut in such a way that eg circle 'a' had been cut away so that the 'aperture' was 'smaller' than the circle itself.  In doing so - it opened up the possibility that its edge could be 'blurred' again by using fingertips.  It seems to me that your finger tips which are only lightly dabbed on to the wooden block and is that this is a more direct and sensitive means of achieving the gentle effect.  If one were to use eg a cotton ear bud it would be only too easy to take away too much.

Left: 7
Oops I have just realised that the next video still says more or less the same thing as number six but I will include it anyway so that people won't wonder "OMG what's happened to jpg number seven - oh I won't be able to get off to sleep tonight with worrying about it"!!


Left: 8
I ought to have mentioned that Karen makes two cut woodblocks.   One is a kind of 'positive' and the other a 'negative',  and these two woodblocks interrelate.  In cases where she might have had to cut-away large expanses of wood instead she cuts around the edge of the shape and then uses stencils to 'mask' the areas that should have been carved away.

Left: 9
It seems that with this process that the proofs come out better by the time you get to the 3rd or the 4th proof.  I have experience of this where Lino cut prints are concerned too.  The paper Karen was using in this workshop was called Nishinouchi - she seemed to think it was an excellent choice for woodcut printmaking.  It seems best to go through your pile of paper  checking for any 'foreign bodies' specks etc that might be on its surface before you actually start inking and printing.


Left: 10
Note in this video still - that you can see both of the inter relating woodcut blocks.
Karen also runs each sheet through the press prior to putting it through on an inked block.  She also puts one of these 'calandered' sheets of paper through the press(an etching press) on top of a block without any ink just to ensure that it behaves OK.
Leave these blocks inked as they are , for when you wish to do some further cutting away from the block.

Note you should always gradually add the colour ink to some transparent base that you have set out on your worktop.

Woodblocks that are slightly imperfect as in, they have for example a 'depressed area' of the block ( that you hadn't noticed before cutting the block) WILL NOT  'pick up' the ink strongly enough when rolled through the press.

In this case have a Baran handy and then you can rub or burnish that area by hand.


Bear in mind before you go onto the second stage of your carving away from your woodblocks that you could make a new differently designed stencil/mask.


Karen Kuncs Portfolio website

Artists print studios that she has set up


at Sev Shoon which has the 6 videos together